Watermark in PowerPoint:
Do you want to give your PowerPoint presentation an exclusive look? If yes, then you are on the right page. To give your presentation an exclusive look, and to prevent it from being copied, and your copyrights been infringed, you should create a watermark. To create a watermark, follow the steps: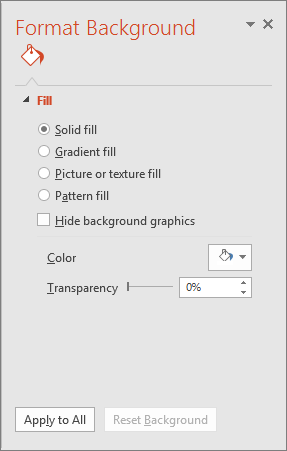
- Click View>>Slide Master.
- In Slide Master View, in thumbnail pane on left, select the slide layouts that you want to add a picture watermark to.
- Right Click on the slide you want and then select Format Background.
- In the Format Background pane on the right, select 'Picture or Texture Fill", and then under Insert Picture Form, select one according to your needs.
- Once you have inserted a picture, go to the Format Background page, and slide Transparency bar according to your needs.
- To apply watermark to all slides, click "Apply to all".
- Close Master View.
You can use a software for this purpose too.
- Click here, and download a copy of it.
- After you've downloaded it, open a PowerPoint presentation.
- Click "Publish" on iSpring panel.
- Switch to "Protection" tab.
- Check the checkbox Add watermark.
- Browse for a picture, set position and adjust transparency according to your needs.
- Click "Publish" and check out the result.
So now you know how to watermark in PowerPoint. Don't forget to check out our other blogs, and our Facebook page.


![Pokemon X and Pokemon Y [TORRENT]](https://blogger.googleusercontent.com/img/b/R29vZ2xl/AVvXsEgqwB8qL9ATbxquv4KPhNkOFdAjnqBX2iuJSzwEdCPS21-LW55mbUlNAiDlyxQw9EOvQiMR8z-DHDvRTpULtlzIoBYTuwhDlY-uw0dOqWjcArepvNN5WuR-MhGAJ2ayGr5FtISDhl-phWg/s72-c/576+-+Pokemon+X+-+8+-+12-10-2013+-+RPG.jpg)


No comments:
Post a Comment